

Time: about 20 minutes · Role: Member or Admin (Viewers cannot create knowledge bases or agents) · Works on: Enterprise and SaaS. On the SaaS Free plan you can have 1 knowledge base and 3 workers (agents and workflows together), and a personal account cannot share. · You need: two or three policy documents as PDF or Word files, for example a leave policy, a remote work policy and expense guidelines
Watch: Build your first agent (1 min 32 s)
What you will have at the end
- A knowledge base named “HR handbook” holding your documents, all processed.
- A published agent named “HR helper” that searches that knowledge base.
- One task in which the agent answered a question and listed its sources.
- The agent shared with a group, or with everyone in your organization.
1. Put your documents in a knowledge base
1
Create the knowledge base
In the sidebar, under Knowledge, click Knowledge bases, then Create Knowledge Base. Under General Information, type “HR handbook” as the Title and a short Description. The title cannot be changed later. Leave Languages (Optional) as it is and click Create.
2
Add a File data source
Click “HR handbook” in the list, then Add Source. Under Storage, choose File. Type “Policies and forms” as the Data Source Name, add a Description and click Create.
3
Upload the documents
Back on the knowledge base page, click “Policies and forms” in the Data Sources list, then Upload, and choose your files. You can upload up to 20 files at a time, each up to 100 MB.
4
Wait until they are processed
Each file appears under Documents as Processing. Most take a few seconds to a few minutes, and the page refreshes on its own.
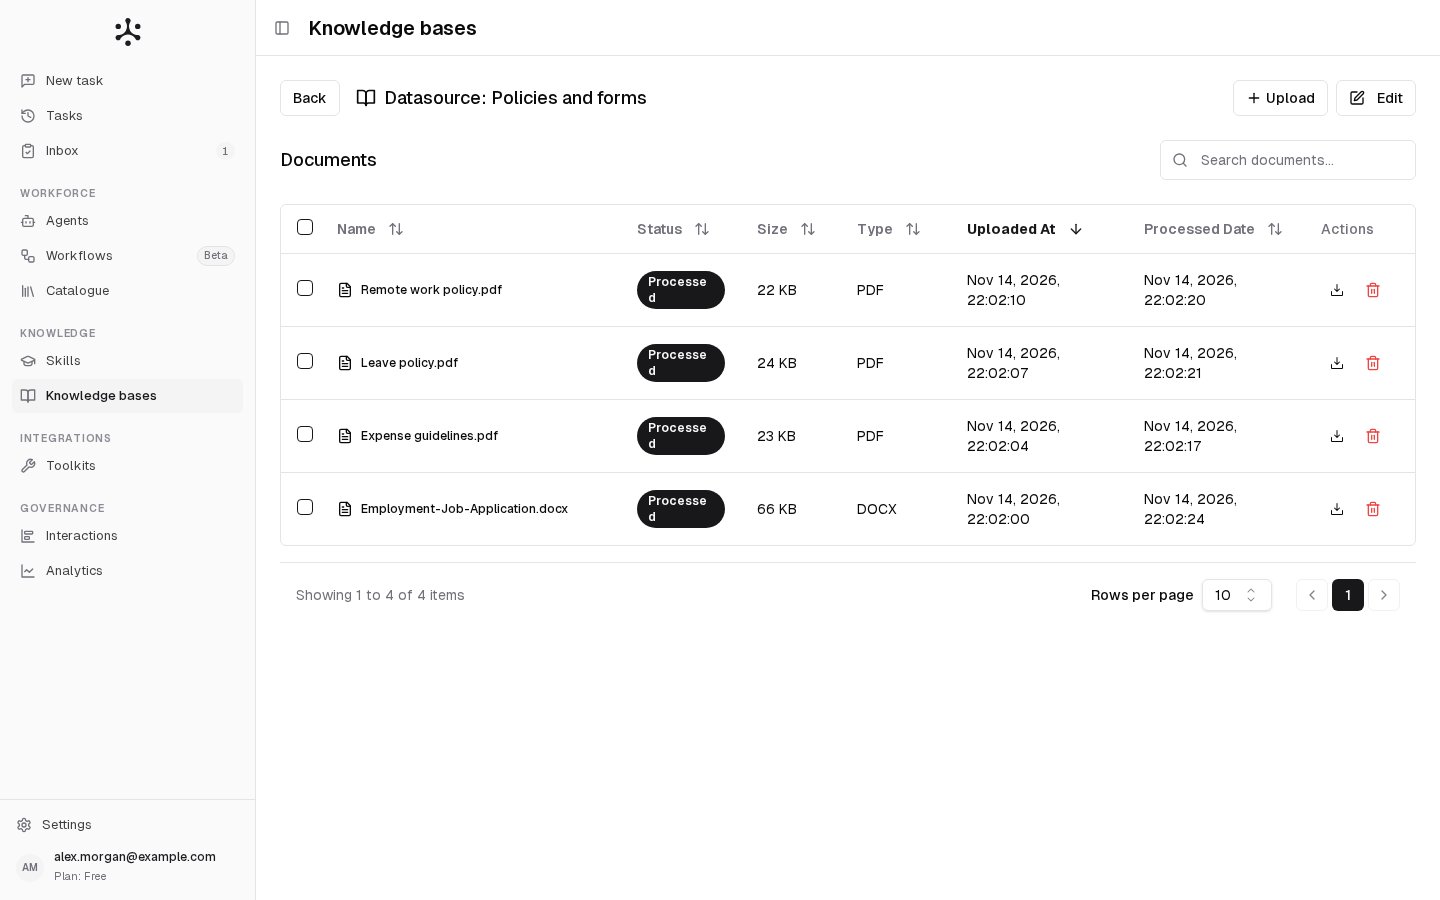
Every document shows Processed, and the knowledge base shows Indexed in the Knowledge bases list.
2. Build the agent
The builder drafts a whole agent from a few sentences, and nothing is saved until you review it.1
Open the builder
Under Workforce, click Agents, then Build an agent. The page asks What do you want to build? Above the text box, choose Agent, so the builder does not suggest a workflow instead.
2
Describe the job
Say who it helps, what it does and which knowledge base it uses. For example:
3
Click Build
The builder shows its progress. When it finishes, the studio opens with the agent’s sections on the right.
4
Check what it knows
Look at What it knows. If “HR handbook” is not listed, click Edit on that section, pick it under Search and select knowledge bases… and click Save changes. Under What it can do, Knowledge search must be ticked, or the agent does not search the knowledge base.
5
Name it and save
If the builder chose another name, click Edit on Identity, type “HR helper” as the Agent Name and click Save changes. Then click Save & publish in the header.
The agent is listed on Agents without the Draft badge.
3. Ask it something and see its sources
1
Start a task
Click New task in the sidebar. Click the agent name in the composer’s bar and pick “HR helper”.
2
Ask a question your documents answer
For example: “How many days of annual leave do I get, and can I carry unused days over to next year?” Press Enter.
3
Open the sources
Below the answer, click the bar that reads N sources used. Each source shows the document’s name, with the page when it is known. Click a source to read the full passage.

The answer names your own policy documents in its sources list.
4. Share it with your colleagues
A new agent is private: only you and Admins can use it. Sharing needs an organization:- Enterprise: you can always share.
- SaaS: a Business organization. On a personal account (Free or Pro) the section reads “Access control applies to organisation accounts; an individual account’s agents are its own.”
1
Open the agent
On Agents, click “HR helper”. Only its creator and Admins can change who may use it.
2
Choose who can use it
Click Edit on Who can use it. Choose Public - All organization members can use for everyone, or keep Private - Only you and selected users/groups can use and pick a group under Grant Access to Groups. Click Save changes.
3
Publish the change
Click Publish in the header, then Publish in the dialog. The new setting applies from then on.
A colleague in that group sees “HR helper” in their New task picker.
If something goes wrong
- Create Knowledge Base or Build an agent is greyed out (SaaS): the tooltip reads Knowledge base limit reached or Worker limit reached (agents and workflows). Delete one you no longer need, or upgrade your plan. See Plans and limits.
- A file is refused when you upload it: check its type (PDF, Word, Excel, PowerPoint, images, text and CSV are accepted) and that no file of the same name is already in the knowledge base. On SaaS, your plan also limits pages. See File uploads.
- A document stays in Processing and the source shows Error: the file could not be read after three tries. Check that it opens on your computer and is not password protected, then delete it and upload it again. See Document processing.
- The answer has no sources: check that “HR handbook” is attached under What it knows, that its documents are Processed, and that you published after the change.