

Time: about 30 minutes · Role: Admin · Works on: Enterprise and SaaS. On SaaS this needs a Business organization; a personal Free or Pro account has no people, groups or sharing. · You need: on Enterprise, the Admin app role for Neural Factory in Microsoft Entra ID, and an IT team that assigns your colleagues to the app; on SaaS, a card to pay for the Business plan and your colleagues’ email addresses
Watch: Set up your organization, on SaaS (1 min 29 s)
What you will have at the end
- An organization with your name and logo, and your colleagues in it with the right roles.
- An “HR” group that can use one agent and one knowledge base.
- A limit on what the organization spends.
1. Create the organization
- Enterprise
- SaaS
An installation holds one organization. If someone already created it, skip to stage 2.
1
Sign in as the first Admin
Click Continue with Microsoft Entra ID and sign in with your work account. The page says Welcome to Neural Factory and Let’s set up your organization.
2
Name it
Enter the Organization Name. You can add an Organization Logo (an image of up to 5 MB) now or later.
3
Create it
Click Create Organization. It starts with a ready-to-use agent named General.
Under Settings, the Organization group lists General and Users & groups.
2. Bring people in
- Enterprise
- SaaS
There is no invite button. Your IT team assigns people, or a Microsoft group, to the Neural Factory app in Microsoft Entra ID. The app role sets their starting role: Admin becomes Admin, Member or User becomes Member, anything else Viewer.People who sign in with Microsoft before a sync are added at that first sign-in.
1
Open Users & groups
Click Settings at the bottom of the sidebar, then Users & groups.
2
Sync
On the Users tab, click Sync from Entra ID. Everyone assigned to the app who has no account yet is added and marked Pending sign-in until they first sign in.
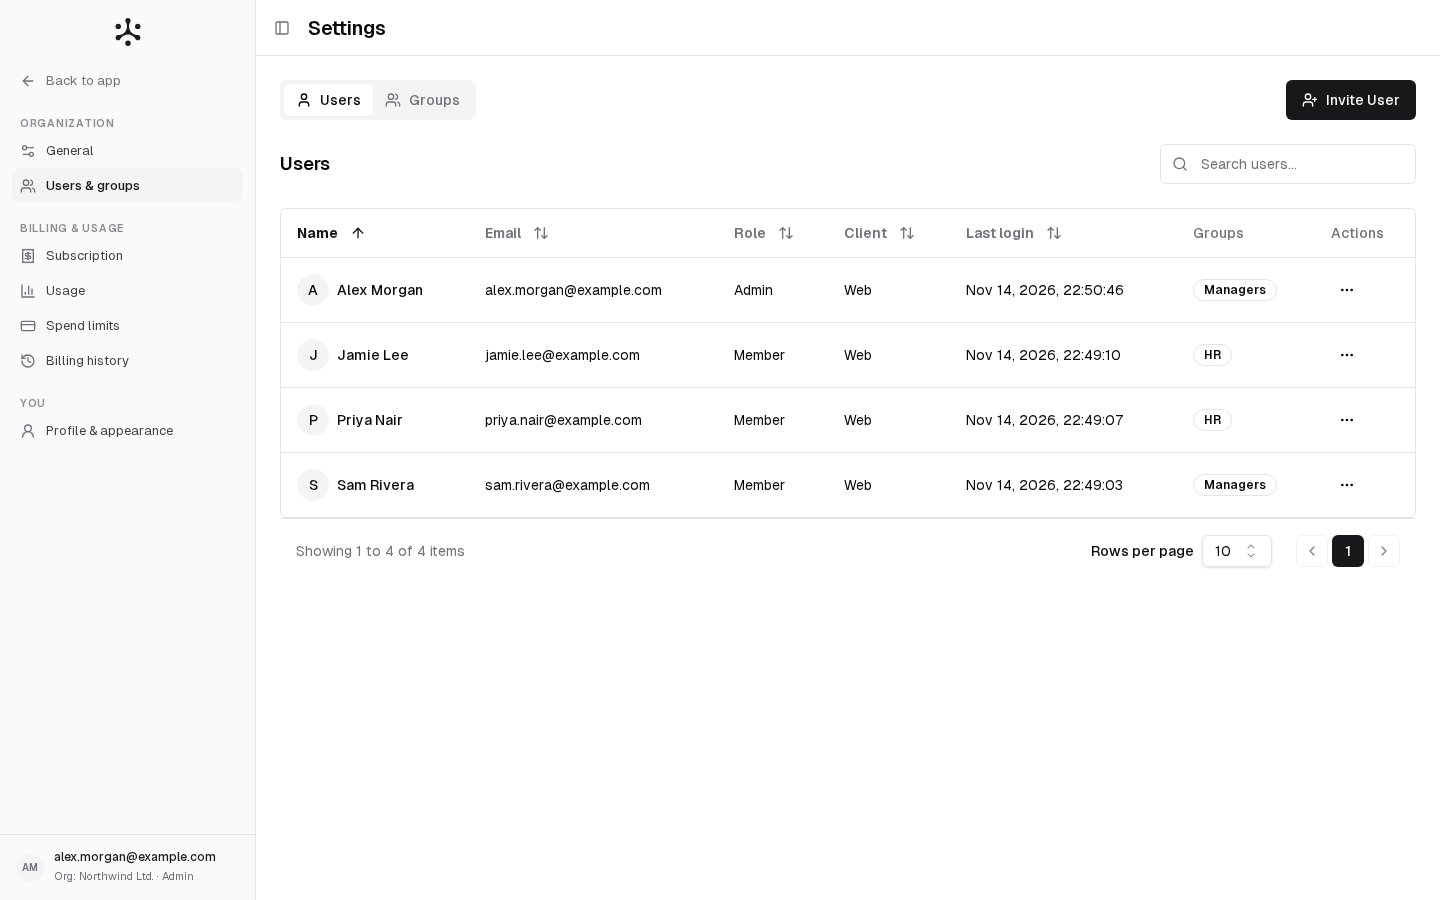
Your colleagues are listed on the Users tab.
3. Set roles
1
Open Edit User
Click ⋯ on a person’s row and choose Edit User.
2
Pick the role
Choose Admin or Member, or on Enterprise also Viewer (Viewers only talk to the agents shared with them). Click Save Changes.
The Role column shows the new role.
4. Create a group
1
Create it
On the Groups tab, click Create Group. Enter “HR” as the Group Name, add a Description if you like, and click Create Group.
2
Add people
Click ⋯ on the group’s row and choose Add Members. Search with Search users…, tick the people and click the Add … Users button.
The “HR” row shows the number of people under Members.
5. Share a first agent and knowledge base
A new agent or knowledge base is private: only its creator and the Admins can use it. Share each with the group. (The General agent an Enterprise organization starts with is public, so everyone can already use it.)1
Share the agent
Go to Agents and open an agent you built, for example with Build your first agent. Click Edit on Who can use it, keep Private, add “HR” under Grant Access to Groups, and click Save changes. Then click Publish: the new sharing applies once you publish.
2
Share the knowledge base
Go to Knowledge bases, open the row’s actions menu and click Edit. In Access Control, keep the private Visibility, add “HR” under Grant Access to Groups, and click Save Changes.
A colleague in “HR” finds the agent in the worker selector on New task. A Member in the group also finds the knowledge base under Knowledge bases (Viewers have no such page).
6. Set the name and logo
1
Open General
Click Settings, then General under Organization.
2
Change them
Edit Organisation name (up to 80 characters). Under Logo, click Upload and choose an SVG or PNG file of 512 KB or less. Click Save at the top right.
Your logo is at the top of the sidebar for everyone, and the user card at the bottom reads
Org: followed by the name.7. Look at usage and set spend limits
Settings › Usage shows what was spent. As an Admin you also see Usage by User, one row per person.- Enterprise
- SaaS
Go to Settings › Spend limits. In Usage Budget Limits, all per calendar month:
- Organization Budget Limit: the most the organization may spend.
0means no organization budget. - Default Per-User Budget Limit: the limit each new person gets.
0 stops that person from spending.The table on Spend limits shows each person’s spend (Current Spend on Enterprise, Top-up used on SaaS) beside the limit you set.
If something goes wrong
- Enterprise: colleagues see Organization Setup Required. No organization exists yet. Once an Admin creates it, their page lets them in by itself.
- Enterprise: Sync from Entra ID adds nobody. Everyone assigned already has an account, or the person is not assigned to the app yet. Ask your IT team to assign them in Entra ID.
- SaaS: an invitation is refused. All seats are taken (add one on Subscription), the address belongs to someone already in another organization, or the organization is frozen.
- You see “The organization must keep at least one Admin. Make someone else an Admin first.” Promote someone before you demote the last Admin.
Where to go next
- Users & groups: everything on that page, including removing people.
- Groups: where groups are used.
- Review what your agents did: see what people asked and what it cost.